Library Organization
Master Your Listings with Library Organization & Filters
Welcome to the heart of your account: the Library, where all your saved listings are neatly organized. Whether they’re live on eBay, ready to list, failed, or scheduled, your listings are always just a click away.
By default, the Library shows you an overview of all your saved listings. But to make things even easier, you can use filters to tailor the view to your specific needs. Want to see only your ready-to-list items or narrow down to a particular status? Filters give you that control, and you can even save your custom filter sets for future use.
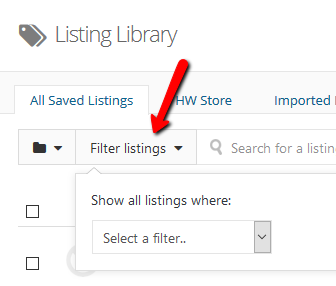
To get started, simply click the “Filter Listings” button. From there, choose the filters that suit your preferences, and watch as your listings instantly transform to give you a more focused view. It’s that easy!
For example, if you need to find listings in a failed status that aren’t linked to your store, just set a filter for "eBay status" as failed, and then add another filter for "not linked to store." This flexibility allows you to combine multiple filters in any way that suits your needs, making it easier than ever to pinpoint exactly what you're looking for.

If you find yourself using a specific filtered view frequently, you can save the filter set for quick and easy access in the future. After configuring your filter criteria, simply click on "Save this search" to store it. This way, you won’t have to set up the filters every time—you’ll have them ready to go with just a click!

You can choose to save your filter set as a new search or overwrite an existing one. Additionally, you’ll have the option to assign a custom name to the saved search, making it easy to identify and access later.

Once your search is saved, a dedicated tab will appear in your library. By selecting this tab, you'll instantly see the filtered listings that match your saved criteria, making it simple to view and manage your listings with just a click.

To remove a saved search from your library, go to the library and click on the relevant tab. Then, click the trash button located to the right of the "Save this search" button. Confirm the deletion by selecting "Delete Search," and the saved search will be removed from your library.

Listing Folders
Organize Your Listings with Folders
You can easily create folders and assign listings to them, either individually or in bulk, to keep your library organized.
To start, navigate to the library and click the folder icon. Then, select the "Manage Folders" button.
A pop-up will appear with options to manage your folders. To delete a folder, simply click the trash icon next to the folder name. If you'd like to create a new folder, click the "Add New Folder" button and name your folder for easy reference.

If you decide to delete a folder, be sure to confirm the action by clicking the "Delete Folder" button. This will permanently remove the folder from your library.

To create a new folder, simply enter a folder name and click the "Add Folder" button.
To assign a listing to a folder individually, either on the Create New Listing page or the Edit Listing page, find the field labeled Save to folder. Select the desired folder, or use the "+" button to create a new one.
For bulk assignments, start by selecting the checkboxes next to the listings you want to organize. Then, click the "Bulk Actions" button at the top right of the screen. From the Bulk Actions menu, select Library Actions and then choose Move to Folder. Afterward, pick the folder you'd like to assign the listings to and click Move Listings.
To view listings within a specific folder, click the folder button, then select the checkbox for the folder you want to see. This will filter your library to show only the listings in that folder.
Listings Page View
Customizing Your Listings Page View
By default, the library displays 50 listings per page, but you can easily adjust this to suit your needs using filters.
To change the page size, go to your library and apply a filter for the desired page size. You’ll find various range options available to select, allowing you to customize how many listings appear per page.

Was this article helpful?