Staff Accounts
Want to keep your inkFrog account secure while giving your team the access they need? Setting up staff accounts is the way to go! With customizable permissions, you can control who sees what – whether it's your employees or virtual assistants – so everyone gets just the right level of access.
Getting started is simple: Log into inkFrog, head to Settings → Staff Accounts, and you're good to go!
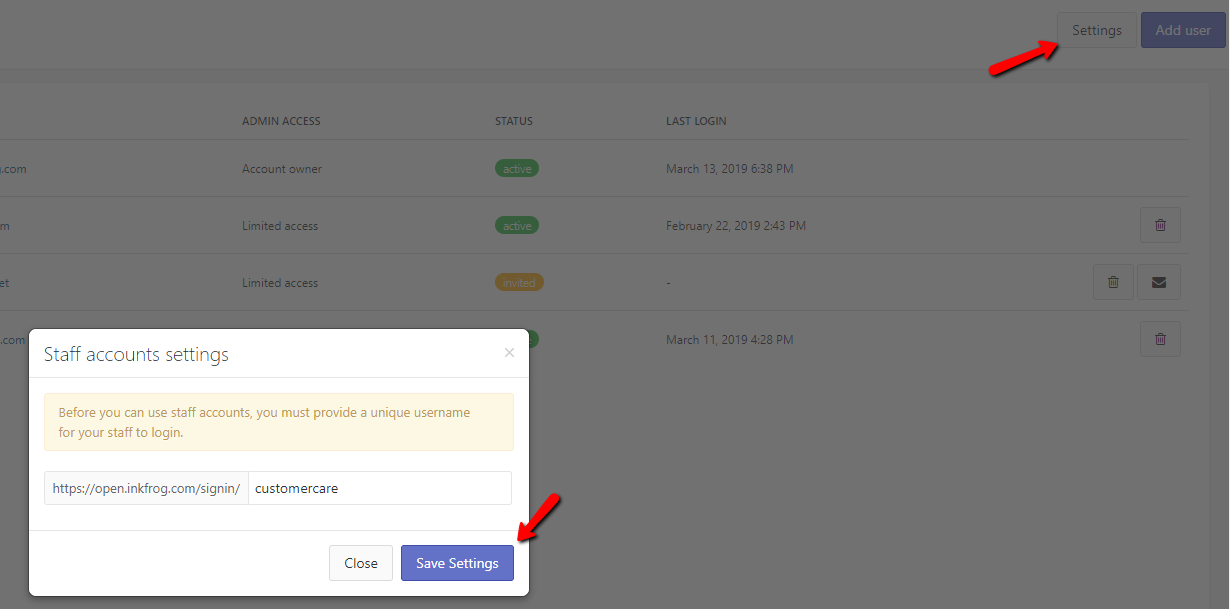
Before you get started, make sure to assign a unique username for the overall staff account. If you decide to change this username later, it will update the login for your staff account, so be sure to notify anyone using it if you make a change!

Once you've saved the staff account username, you're ready to add your first team member!
The account owner will be automatically listed on the staff accounts page.
Next, click the "Add User" button. Fill in their First & Last Name, Email, and Optional Phone number. Then, set their permissions by selecting only the areas of the account they should have access to.
If you want to give them full access to the inkFrog account, just make sure "Limit admin access for this user" is NOT selected.
Finally, hit "Send Invite" to get them onboard!

After you click "Send Invite," the status of the staff account will change to "Invited."
The staff member will receive an email with a link to accept the invitation and set up their own password.
If needed, you can delete the staff account or resend the invitation from this page.
Once the staff member receives the email, they simply need to click "Accept Invitation." This will take them to a page where they can finalize their account details.
Once everything is updated, they can hit "Create Account" to complete the process.
And just like that, they’re ready to get started!

Once the staff account member creates their account, they’ll receive another email confirming the account creation.
This email will include their username and a login link so they can easily access their account and get started.
The login link for staff accounts is distinct from the account owner's login and will remain the same for all staff account members unless you change the unique username, in which case the login link will update.
For easy access, it's a good idea for your staff account members to bookmark this link so they can quickly log in whenever they need to.
Once the staff account member completes the account creation process, their status will change to Active on the staff accounts settings page.
To make updates to a staff account at any time, simply go to Settings, click on the name of the staff member you want to edit, make the necessary changes, and hit Save.
If you need to remove a staff account member, just click the trash button next to their name, and they’ll be removed from the account.
Was this article helpful?
