Using inkFrog Apps
Channel Connections
inkFrog makes it effortless to import your listings from multiple platforms, including Amazon, eBay (via inkFrog for BigCommerce), Shopify, and even spreadsheets. Need to export your data? No problem! Seamlessly transfer your listings from inkFrog to Amazon, BigCommerce, Shopify, or a spreadsheet with just a few clicks.
For step-by-step instructions on connecting your store, check out our detailed guides under Channel Connections. Get started today and streamline your eCommerce workflow!
Images
Upload your images effortlessly from the Create New or Edit Listing pages, or dive into Apps → Images for complete image management.
In the Images section, you’ll have everything you need at a glance—thumbnail previews, organized folders, filters, upload dates, image sizes, and dimensions—making it easy to keep track of your visuals.
At the top right, you’ll find quick-access controls for pagination, importing from URLs or Dropbox, and fast image uploads.
Each image includes edit and delete options on the far right, while clicking a thumbnail lets you view a larger version for a closer look.
Need to manage multiple images at once? Simply select one or more images to unlock powerful bulk actions, including:

Image Editor
Once you've uploaded your images to inkFrog, simply click the Edit button on the far right of an image to access a full suite of powerful editing tools designed to make your photos shine.
- Crop: Trim away any unwanted space around your image with this handy tool. Perfect for fine-tuning your shot!
- Transform: Need to rotate your image? This tool lets you quickly adjust the angle to get it just right.
- Draw and Text: Add annotations, notes, or even text to your image if you need to highlight something important.
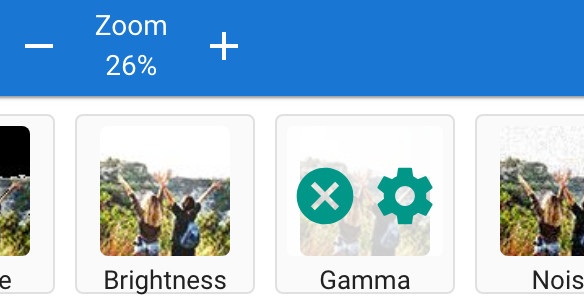
- Filter: If your image feels a bit flat, too dark, or the colors are off, click “Filter” to open a range of options to enhance your photo and make it pop.
- Sharpen: Want to make your image crisper? Click this tool to sharpen the details and make the edges more defined. Click it again to remove the sharpening effect if needed.
- Brightness: Adjust the lighting of your image! If it’s too dark, lighten it up, or if it’s too bright, bring the definition back. Just click the tool, then the gear icon, and move the slider to your ideal brightness.
- Gamma: Eliminate color casts and fine-tune your image’s color balance. Click the tool, then the gear icon, and use the sliders for red, green, and blue to remove unwanted color tints.
- Remove: Need to get rid of a particular color in your image? This tool lets you remove it, replacing the selected areas with white. Click the gear icon, select the color, and adjust the slider to your preference.
Inside the Filter menu, simply click on a tool to apply it, and for finer adjustments, click the gear icon for even more control over each effect.
Once you're happy with your edits, don’t forget to hit Save to lock in your changes and make your images stand out!
GTC Watchdog
Take full control of your eBay listing durations with GTC Watchdog! Customize multiple watchdog rules to fit your exact needs, adjust them anytime, and seamlessly pause or resume them whenever necessary. With this level of flexibility, you can manage your listings with confidence and ease—ensuring they align perfectly with your strategy!

Rule Name: Give your rule a name that makes it easy to identify (this is for your reference only).
eBay Account: Choose the eBay account where the rule will apply.
eBay Market: Select the specific eBay market for your rule.
Primary Category: Keep it set to "Any Category" or choose a specific eBay category, so the rule only affects listings in that category.
Pricing: Choose how you want to apply the rule: Any Price, Equal to, Greater than or Equal to, or Less than or Equal to.
Quantity: Select the quantity criteria: Any Quantity, Equal to, Greater than or Equal to, or Less than or Equal to.
Action: Set the rule to end listings X days before the GTC renewal.
Ignore Auto Relist Rules: If checked, listings ended by the GTC Watchdog will not be automatically relisted by inkFrog.
Don't End Listings with Sales: Check this if you want to exclude listings with sales history on eBay from the watchdog rule.
Enable Rule Immediately: If selected, the rule will take effect right away, affecting any GTC listings that meet the criteria and ending them early.

After saving your rule, you can easily pause, resume, edit, or delete it. If you have listings that meet the criteria but want to exclude them from the rule, just edit the listing and check the Ignore GTC Watchdog Rules box.
After saving your rule, you can easily pause, resume, edit, or delete it. If you have listings that meet the criteria but want to exclude them from the rule, just edit the listing and check the Ignore GTC Watchdog Rules box.
Print Templates
You can quickly print invoices and address labels for any order directly from your inkFrog account—whether you need an address label, an invoice, or both!
Adding a Logo to Your Print Template
Personalize your invoices by adding your company logo! Here's how:
- Go to Apps → Print Templates.
- Find the template you want to edit and click the pencil icon (Edit Template) next to "Invoice" to open your invoice template.
- The HTML code for your invoice template will appear. Not familiar with HTML? No problem! You only need to add one simple line of code.
- In the editor, place your cursor at the very start of the first line, press Enter to create a blank line, then use your arrow keys to move back to this new blank line.
- Insert the following code: <img src="" height="50">
- Now, click between the quotation marks and paste the web address of your logo image.
- To see how your invoice will look with your logo, click the Preview button at the top right.
- Once you're happy with the preview, click Save Template to apply your changes.
Your invoices will now have your company logo at the top, giving them a professional touch!

Customizing the Code
We won’t dive deep into how the templates are structured, but if you're familiar with HTML, a quick look at the template will reveal that it's mostly made up of standard HTML code. You’ll also see a few dynamic fields for details like your seller name, address, order ID, and more.
If you plan to make major changes to a print template, it’s a good idea to create a new template first. That way, if you make a mistake or don’t like the outcome, you can easily revert back to your original template without any issues.
Was this article helpful?
Yes
No